I know this looks like alot of work, but once you know what you are doing, it will take like 10 minutes every time you need to make one
Tools Required: -TERRAGEN
-Your favourite image editing software. Eg, GIMP
-The attached script
______________________________________________________________
Method: (1) - Open up Terragen. On the Rendering Control Panel, set 'image size' to 960px x 960px. Set 'Detail' slider to maximum. For this tutorial, we are going to forget about land, so untick 'land' (you can try adding land later on at your own will. Optional settings: Go into 'render settings', and increase quality sliders. This will make your box have a higher quality, but will take longer to render.

Hit 'Render Preview' to have a look at what you have. Move the three lined thingy round to look at different parts of your sky, as that is the camera.
______________________________________________________________
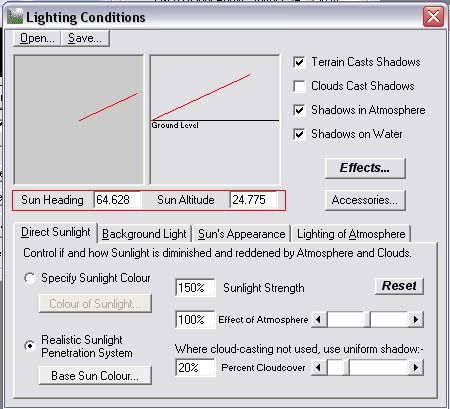
(2) - OK, lets get your lighting set up. Click on the Sun icon on the left hand panel. There will be 2 pictures, each with a red line on them. The left one is sun direction, the right is sun elevation. Move these around till you get a setting you think is right. You can move this round later if you like. But whatever setting you render with, write down the values for Sun heading and Sun altitude, these will be needed for your track.
______________________________________________________________
(3) - Have a play around with Atmosphere settings (the blue-white gradient) and Cloudscape (the cloud image).
______________________________________________________________
(4) - Once you have something you like, its time to export. With that downloaded script you have, you will need to edit the second line. This will determine the location and name of the rendered images.
InitAnim "C:\Documents and Settings\Owner\Desktop\Folder\Filename", 1
Things to edit: Owner = your computer sign in name
Folder = Folder name (if not on the desktop, edit path to suit)
Filename = Name of the images. These will be saved as Filename0001.bmp, Filename0001.bmp etc.
Once you've edited these lines, save the script.
In Terragen, go Terragen>Execute Script. Find your script, and let it render the 5 images. Could take a while depending on your computer.
______________________________________________________________
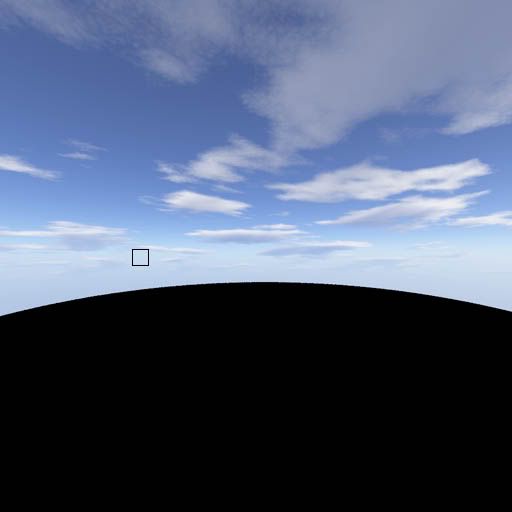
(5) - The images rendered will be these directions
0001 = West
0002 = North
0003 = East
0004 = South
0005 = Up
______________________________________________________________
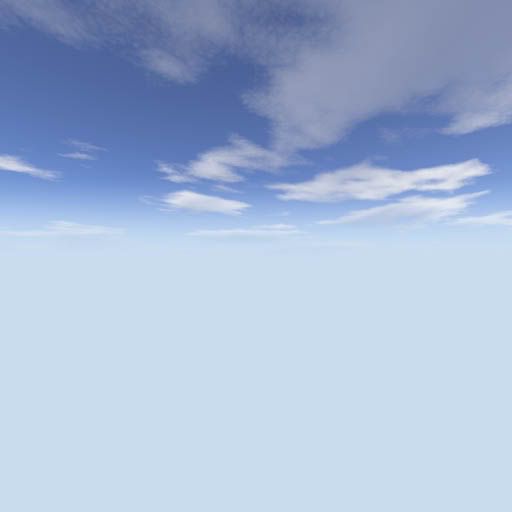
(6) - Open up 0001. Sample a colour in its fog zone. Like this:
Write down the RGB values of this. In my case, its 200, 219, 239. These will be needed for the games fog colour.
______________________________________________________________
(7) - Make a new layer. From about halfway to the bottom, fill with this colour. Then, from the half way mark, do a gradient fade upwards, about 1/4 of the image up. Should be like this:
Copy and paste this layer into a blank document, as you will need this for the remaining 3 side images.
Go back to the 0001 image, and flatten it (so the fog colour and skybox image are one layer). The image size will be 960x960 pixels. If you are using photoshop, you might want to make an action out of this (google it). Resize the image to 1010x1010 pixels. Select the whole image, and copy it. Now resize the base image to 1024x1024 pixels. Paste what you copied now, center it (should automatically center anyway). (End action there). Save image as something like sky_west.png. Heres what we should have (note: I've darkened the pasted image so you can see what i did. Dont you darken it):
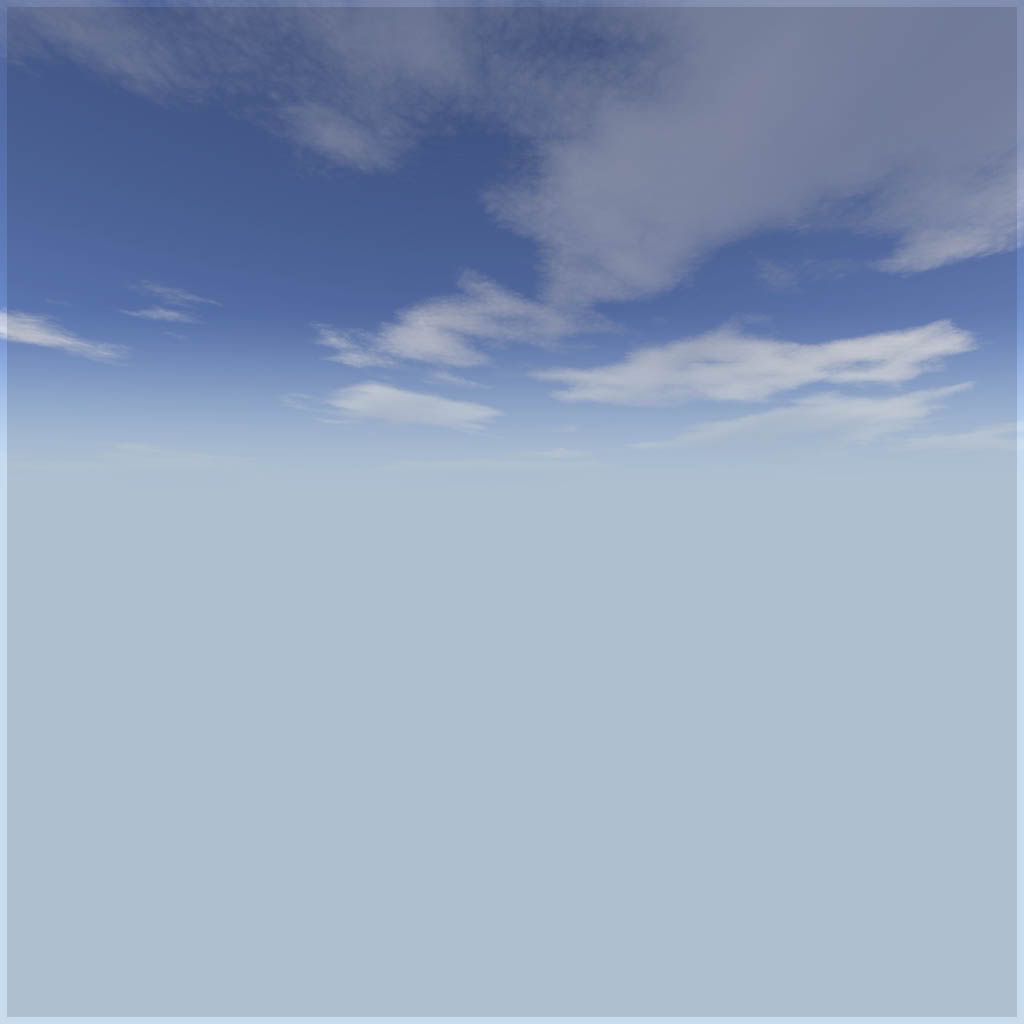
Notice how it has a border. I think that the game's skybox's edges overlap, and from testing, 1010x1010 pixels seems to be the right size. If you dont understand, dont worry, it will work.
Open up your 0002, 0003, 0004 images (north, east, south), copy and paste the fog colour from that separate file into your skybox image, make sure it is positioned to the bottom, and repeat what was done above. For 0005 (up), do not copy and paste the fog colour into it.
______________________________________________________________
(8) - Put the 5 images into your track folder. Open up the lighting file, and get the game to load your images by adding lines like these:
sky_x @foldername/image_x.png (x is first letter of direction, eg x=n if north. x=u for up)
eg.
sky_n @oldgoldberry/sky_north.png
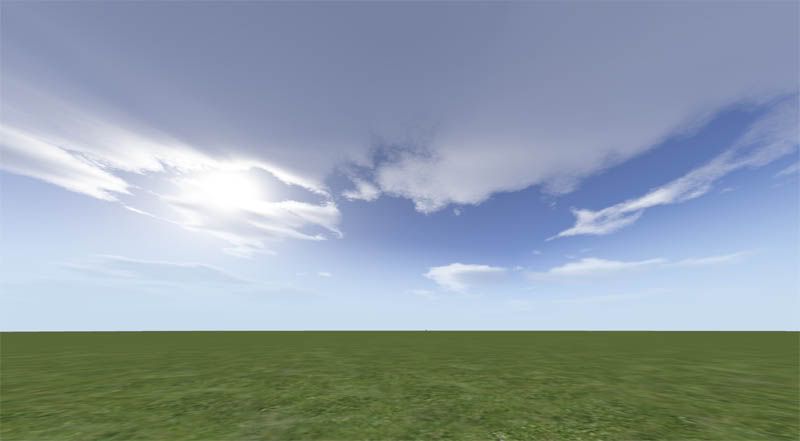
Have a go of your track and test out your skybox. Here's how my test one looks
______________________________________________________________
(9) - Maths time now. We have to work out the sun vector from the Sun heading and Sun altitude values. The sun vector is written as
sun_vector [ x y z ]
Let x=1 if sun heading is on right side, and let x=-1 if sun heading is on left side
Using sun altitude, y = tan (sun altitude value)
eg, my sun altitude was 24.7°
y = tan(24.7) = 0.46 (make sure whatever you are using is set to degrees not radians. Anything between 0 and 45° will be between 0 and 1)
For z, let there be 4 quadrants, like in this picture (the quadrants are what the roman numerals are)

If your sun heading line is in:
Quadrant I, then z=sin([Sun Heading Angle]-90)
Quadrant II, z=sin(-[Sun Heading Angle]-90) (sun heading angle will be negative, so negative in front will make positive)
Quadrant III, z=sin(270-[Sun Heading Angle])
Quadrant IV, z=sin([Sun Heading Angle]-90])
Quadrant I and II should produce something between 0 and -1, and the other 2 quadrants should produce something between 0 and 1
Eg, with my box, Sun Heading Angle = 64.6. It is in Quadrant I, so z=sin(64.6-90)= -0.43
Therefore, for my box, sun_vector [ 1.0 0.46 -0.43 ]
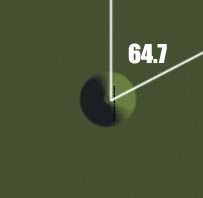
Refresh your shading in game. You should see that the lighting lines up with the Sun Heading Angle line in terragen. As you can tell here, the lighting looks as if it makes an angle of 64.7°
If your flat ground looks too dark because of a low Sun Altitude, just increase the values of your ambience
Eg from "ambient [ 0.25 0.25 0.50 ]" to "ambient [ 0.35 0.35 0.70 ]"
______________________________________________________________
(10) - Fog time. Fog is layed out like so:
fog [red green blue] density
eg: fog [0.56 0.64 0.35] 0.0032
The RGB values you wrote down before need to be scaled down to between 0 and 1, instead of between 0 and 255. So, just divide your values by 255.
So, 200, 219, 239 goes to 0.78, 0.85, 0.94
ie: fog [0.78 0.85 0.94] 0.0032
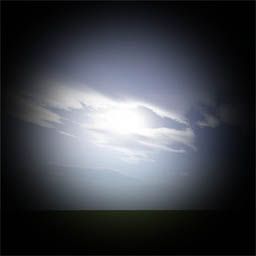
Play around with density till you get something that looks ok. Heres how mine turned out

______________________________________________________________
(11) - Sun flare (taken from track files explained)
flare_element [x y] [red green blue] size @foldername/image.png (size should be ~1. x=0, y=0 flare is centre of screen, x=0, y=1 flare is on vector. Black in image represents transparency)
flare_vector [x y z] (self explanatory, if sun flare, same as sun_vector)
In my case (using JLV's flare textures)
flare_element [ 0.0 1.0 ] [ 0.5 0.5 0.5 ] 0.75 @glare.png
flare_element [ 0.0 -0.0 ] [ 0.0 0.0 0.125 ] 0.5 @glare.png
flare_element [ 0.0 -0.25 ] [ 0.0 0.125 0.0 ] 0.5 @glare.png
flare_element [ 0.0 -0.5 ] [ 0.125 0.0 0.0 ] 0.5 @glare.png
flare_element [ 0.0 -0.9 ] [ 0.0 0.0 0.0625 ] 0.4 @ring.png
flare_element [ 0.0 -0.95 ] [ 0.0 0.0625 0.0 ] 0.5 @ring.png
flare_element [ 0.0 -1.0 ] [ 0.0625 0.0 0.0 ] 0.6 @ring.png
flare_vector [ 1.0 0.46 -0.43 ]
______________________________________________________________
(12) - Making the environment mapping image: Take a screenshot of the sky in game, and put a black border around it like so:
Remember, keep it as a power of 2 image. Put image in your track folder, and enter into the lightning file like so
sky_env @foldername/image.png
______________________________________________________________
(13) - When you make sunsets, play around with the main flare colour, and also the sun colour, using RGB value conversions as shown above.
______________________________________________________________
(14) - Here is my overall lighting file
sun_vector [ 1.0 0.46 -0.43 ]
sun_color [ 1.00 1.00 0.50 ]
ambient [ 0.25 0.25 0.50 ]
sky_n @treetest/north.png
sky_e @treetest/east.png
sky_s @treetest/south.png
sky_w @treetest/west.png
sky_u @treetest/up.png
sky_env @treetest/env.png
flare_element [ 0.0 1.0 ] [ 0.5 0.5 0.5 ] 0.75 @glare.png
flare_element [ 0.0 -0.0 ] [ 0.0 0.0 0.125 ] 0.5 @glare.png
flare_element [ 0.0 -0.25 ] [ 0.0 0.125 0.0 ] 0.5 @glare.png
flare_element [ 0.0 -0.5 ] [ 0.125 0.0 0.0 ] 0.5 @glare.png
flare_element [ 0.0 -0.9 ] [ 0.0 0.0 0.0625 ] 0.4 @ring.png
flare_element [ 0.0 -0.95 ] [ 0.0 0.0625 0.0 ] 0.5 @ring.png
flare_element [ 0.0 -1.0 ] [ 0.0625 0.0 0.0 ] 0.6 @ring.png
flare_vector [ 1.0 0.46 -0.43 ]
fog [0.78 0.85 0.94] 0.0032
______________________________________________________________
Good luck.
SCRIPT